
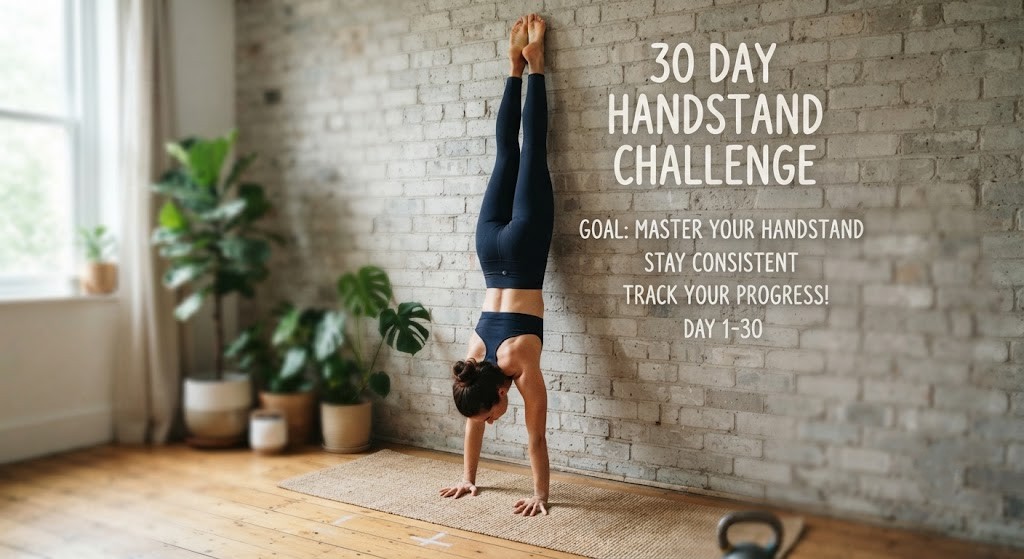
A handstand may look like a simple bodyweight skill, but holding your body upside down requires strength, balance, mobility, coordination, and precise technique. Without a structured plan, beginners often practice random kick-ups, repeat the same mistakes, or lose confidence after unsuccessful attempts.
The 30 Day Handstand Challenge breaks the skill into manageable stages. Over 30 days, you’ll work through wrist and shoulder preparation, core strengthening, wall-supported handstands, kick-up practice, balance drills, and controlled freestanding attempts. You’ll also learn how to measure progress without making a 30-day promise that everyone will achieve a perfect freestanding handstand.
What Is a 30 Day Handstand Challenge?
A 30 Day Handstand Challenge is a structured training plan designed to progressively develop the strength, balance, mobility, coordination, and technique required for a handstand.
Rather than repeatedly attempting a full handstand from the first day, you gradually develop the physical and technical skills needed for inversion. This makes the challenge more approachable for beginners while giving experienced trainees a clear framework for refining their technique.
Handstand training requires several body systems to work together, including the wrists, shoulders, arms, core, hips, and legs. A 2025 systematic review identified 21 biomechanical handstand studies and found that wrist, shoulder, hip, and elbow strategies can all contribute to balance control. — Source: PubMed, 2025
For example, a beginner might begin with pike holds and wall-supported positions before progressing to controlled kick-ups. This approach makes improvement easier to track and provides multiple milestones beyond simply achieving a freestanding handstand.
Can You Learn a Handstand in 30 Days?
A 30-day program can improve handstand strength, body awareness, balance, coordination, and confidence. However, achieving a consistent freestanding handstand may take longer than 30 days for some beginners.
Your timeline depends on factors such as:
- Starting strength
- Wrist tolerance
- Shoulder mobility
- Coordination
- Practice quality
- Recovery
- Previous calisthenics or gymnastics experience
Someone with previous bodyweight-training experience may progress differently from someone attempting their first inversion.
For example, one person might finish Day 30 with a controlled five-second freestanding hold, while another might develop a strong wall handstand and more confident kick-ups without yet holding independently.
The purpose of a 30-day challenge is to measure progress rather than promise a specific final result.
Why Is a 30 Day Handstand Challenge Effective for Beginners?
A 30 Day Handstand Challenge works well as a beginner framework because it breaks a complex movement into smaller, repeatable skills.
Instead of treating the handstand as a single exercise, the challenge develops several components separately:
- Wrist preparation
- Shoulder mobility
- Upper-body strength
- Core control
- Body alignment
- Inversion confidence
- Kick-up technique
- Balance control
- Safe exits
This progressive approach also fits with established exercise guidance. Adults are generally advised to perform muscle-strengthening activities involving major muscle groups on at least two days per week. — Source: World Health Organization, 2020
Rather than performing maximum-effort kick-ups every day, you can combine short handstand practice with appropriate strength, mobility, and recovery work.
How Often Should You Practice Handstands?
Handstand practice should be frequent enough to develop coordination while giving your wrists, shoulders, and other tissues appropriate time to recover.
Beginners generally benefit more from short, focused practice than from long sessions filled with increasingly poor attempts. WHO guidance also recommends gradually increasing exercise frequency, intensity, and duration instead of suddenly beginning with excessive training volume. — Source: World Health Organization, 2020
A practical beginner session can last approximately 15–25 minutes, including preparation, skill practice, strength exercises, and recovery.
For example:
- 5 minutes: Wrist and shoulder preparation
- 10 minutes: Handstand drills
- 5–10 minutes: Core or mobility work
This keeps the session focused without turning every practice into a test of maximum endurance.
What Should You Do Before Starting a Handstand Challenge?
Before beginning a 30 Day Handstand Challenge, prepare your wrists, shoulders, core, training space, and confidence for controlled inverted practice.
This preparation matters because handstands place body weight through the upper extremities. Gymnastics research has highlighted substantial weight-bearing demands on the wrists and arms, making progressive loading and appropriate technique important considerations. — Source: PubMed, 2017
For example, performing dozens of kick-ups immediately after little or no wrist preparation can unnecessarily increase training stress.
How Do You Prepare Your Wrists and Shoulders?
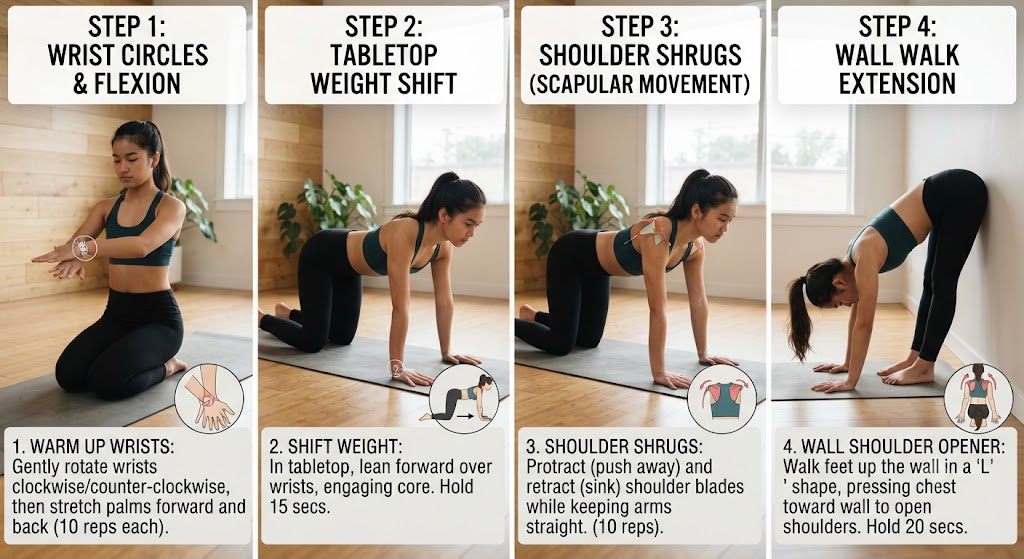
Wrist preparation uses gentle, controlled movements to prepare your hands and wrists for weight-bearing. Shoulder preparation helps you develop the overhead position required for a stable handstand.
Before each session, perform:
- Wrist circles for 20–30 seconds
- Palm pulses for 8–10 repetitions
- Gentle wrist extension stretches
- Arm circles for 20–30 seconds
- Wall shoulder slides for 8–10 repetitions
- Downward dog for 20–30 seconds
- Scapular push-ups for 8–12 repetitions
For more preparation ideas, see our Good Forearm Workouts and shoulder mobility exercises guides.
What Does a Safe Handstand Practice Space Look Like?
A safe handstand practice area should provide enough room to enter the position, hold it, and safely exit without hitting nearby objects.
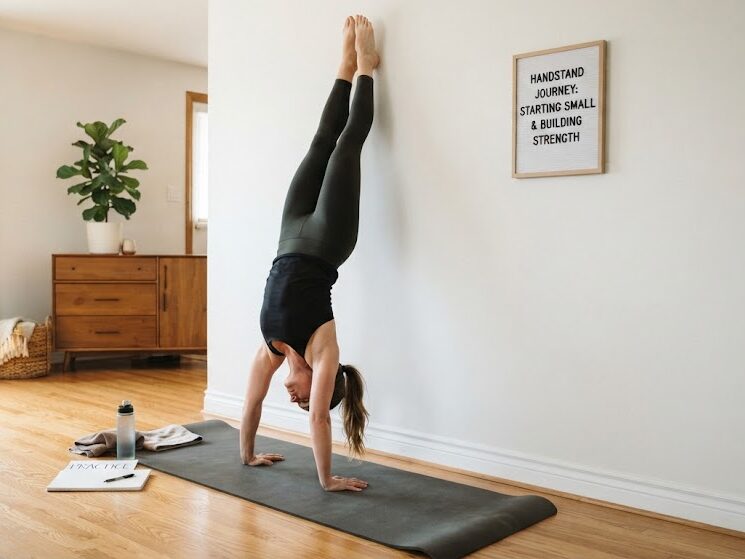
A clear wall, exercise mat, and open floor are usually sufficient for beginner practice. Remove furniture, sharp objects, loose obstacles, and slippery surfaces before beginning.
If you experience significant wrist, shoulder, elbow, or other pain, stop the exercise and seek appropriate medical or physiotherapy advice.
For example, practicing beside a clear wall with enough space around you gives you room to step out rather than becoming trapped against furniture.
How Do You Start Learning a Handstand as a Beginner?
A beginner handstand progression typically moves through several stages:
Preparation → Strength → Wall support → Kick-ups → Balance → Freestanding practice
The first week should focus primarily on position, strength, and becoming comfortable with inversion rather than immediately chasing a perfect freestanding handstand.
Beginners can also supplement their handstand practice with a beginner calisthenics workout to develop general bodyweight strength.
Days 1–7: Build Your Handstand Foundation
Days 1–7 establish the foundation for the rest of the 30 Day Handstand Challenge. The objective is to become comfortable supporting your body through your hands while learning basic body tension and alignment.
| Day | Main Focus | Practice |
|---|---|---|
| 1 | Wrist + core | Wrist preparation, plank 3×20 sec, hollow hold 3×15 sec |
| 2 | Shoulder position | Downward dog 3×30 sec, pike hold 3×20 sec |
| 3 | Wall confidence | Wall walk 3×2, chest-to-wall hold 3×15 sec |
| 4 | Recovery | Shoulder mobility, wrist work, gentle core |
| 5 | Inversion | Wall walk 3×2, wall handstand 3×20 sec |
| 6 | Body tension | Hollow hold 3×20 sec, pike hold 3×25 sec |
| 7 | Checkpoint | Wall handstand 3×20–30 sec + technique review |
During wall-supported practice, keep your elbows straight and actively push the floor away. Think about making your shoulders as tall as possible rather than allowing your chest to collapse toward the floor.
Next, keep your ribs controlled and gently engage your abdominal muscles. This creates a more organized body position and helps limit excessive lower-back arching.
What Exercises Help Build Strength for a Handstand?
Handstand strength exercises develop the shoulder, arm, wrist, and core capacity needed to support your body upside down.
Useful beginner exercises include:
- Pike holds — 3 sets of 20–30 seconds
- Wall walks — 3 sets of 2–4 repetitions
- Plank shoulder taps — 2–3 sets of 8–12 per side
- Hollow-body holds — 3 sets of 15–30 seconds
- Pike push-ups — 2–3 sets of 5–10 repetitions
- Chest-to-wall handstands — 3 sets of 15–30 seconds
Your core should remain actively engaged during the handstand rather than being treated as a muscle group that only matters during abdominal exercises.
Our core strengthening exercises and 360 Abs Workout can provide additional training ideas.
Handstand strength becomes useful when you can control that strength through the correct body position.
How Do You Progress From Wall Handstands to Freestanding Handstands?
Moving from wall handstands to freestanding handstands requires gradually reducing external support while learning to control balance.
The key transition is learning to make small corrections rather than repeatedly kicking harder.
A 2025 systematic review found that successful handstand balance relies heavily on a wrist strategy, with additional adjustments involving the shoulders, hips, and elbows when necessary. — Source: PubMed, 2025
Days 8–14: Develop Inverted Control
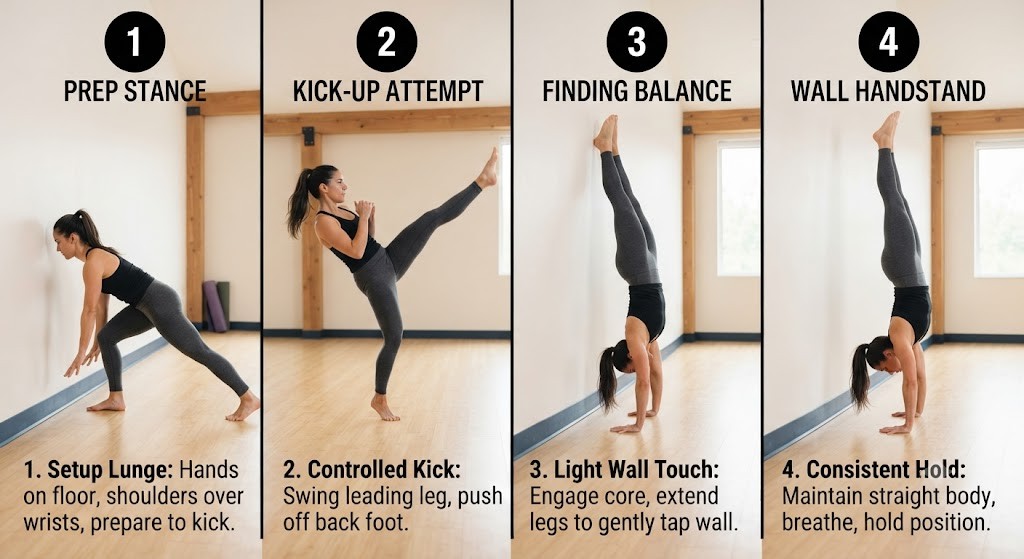
Days 8–14 introduce longer wall holds, wall walks, weight shifts, and controlled kick-up practice.
This stage teaches you to actively use your shoulders and hands instead of passively leaning into the wall.
| Day | Focus | Main Practice |
|---|---|---|
| 8 | Shoulder strength | Pike push-ups 3×6 + wall hold 3×20 sec |
| 9 | Weight shifting | Wall weight shifts 3×6 each side |
| 10 | Wall walks | 3×3 wall walks + hollow hold |
| 11 | Recovery | Mobility + light core |
| 12 | Kick-up basics | 8–12 controlled kick-up attempts |
| 13 | Alignment | Chest-to-wall hold 3×25 sec |
| 14 | Checkpoint | Wall hold + controlled kick-ups |
When practicing kick-ups, use enough power to reach the wall without crashing into it. Start with a smaller entry and gradually learn how much force is necessary.
Focus on:
- Active shoulders
- Straight elbows
- Engaged core
- Controlled breathing
- Consistent hand placement
How Can You Improve Handstand Balance?
Handstand balance involves making small adjustments through the fingers, hands, wrists, shoulders, and core to keep your center of mass appropriately positioned over your hands.
Therefore, balance is not necessarily about remaining completely motionless. Instead, it involves making subtle corrections before small movements become large losses of balance.
For example, pressing your fingertips into the floor can help control movement toward overbalancing, while shoulder adjustments can help maintain your overall body line.
Days 15–21: Practice Freestanding Handstand Skills
Days 15–21 introduce controlled freestanding practice while continuing useful wall work.
Keep attempts short because balance quality can decline as fatigue increases.
| Day | Focus | Main Practice |
|---|---|---|
| 15 | Kick-ups | 10 controlled attempts |
| 16 | Toe pulls | 4×3–5 controlled repetitions |
| 17 | Balance | 10–15 short freestanding attempts |
| 18 | Recovery | Shoulder and wrist mobility |
| 19 | Kick-up control | 12 quality attempts |
| 20 | Alignment | Chest-to-wall hold + toe pulls |
| 21 | Checkpoint | Record your best controlled attempts |
Use your fingers as a braking system when you begin falling forward. A gentle increase in fingertip pressure can help control excessive forward movement.
Avoid immediately chasing every failed attempt with another kick-up. Rest for 20–45 seconds between quality attempts so that your technique remains controlled.
Balance improves through controlled corrections, not endless failed attempts.
How Long Should You Hold a Handstand During Training?
Beginner handstand holds should generally be short enough to maintain good technique. Wall-supported holds are commonly practiced for approximately 15–30 seconds at a time.
Longer holds should be developed gradually rather than forced from the beginning.
The goal is to maintain alignment while keeping the shoulders active and the hands firmly connected to the floor.
For example, three high-quality 20-second wall holds can provide more useful technical practice than one 60-second hold performed with collapsed shoulders and poor positioning.
What Are the Most Common Handstand Mistakes Beginners Make?
Common beginner handstand mistakes include excessive kicking, bent elbows, passive shoulders, inadequate wrist preparation, excessive lower-back arching, and excessive practice volume.
Common problems include:
- Over-kicking: Entering the handstand with excessive force
- Bent elbows: Losing a strong support position
- Passive shoulders: Allowing the shoulders to collapse
- Loose core: Creating excessive spinal extension
- Poor hand pressure: Ignoring finger-based balance corrections
- Too much volume: Continuing after technique deteriorates
- Skipping recovery: Repeatedly loading the wrists without adequate rest
Research on gymnastics has highlighted the substantial demands placed on the upper extremities during weight-bearing activities. — Source: PubMed, 2024
For example, persistent wrist discomfort should not simply be ignored as normal training fatigue.
How Do You Complete Days 22–30 of the Handstand Challenge?
Days 22–30 focus on consistency, controlled freestanding attempts, endurance, alignment, and safe exits.
The objective is not simply to increase the number of attempts. Instead, you should turn isolated successful attempts into more repeatable skill practice.
| Day | Objective | Practice |
|---|---|---|
| 22 | Kick-up consistency | 10–15 quality attempts |
| 23 | Freestanding balance | Short holds + toe pulls |
| 24 | Endurance | Wall hold 3×30 sec |
| 25 | Recovery | Mobility + light core |
| 26 | Freestanding practice | 12–15 controlled attempts |
| 27 | Alignment | Chest-to-wall holds + kick-ups |
| 28 | Exit control | Cartwheel/step-out practice |
| 29 | Final rehearsal | Best-quality attempts |
| 30 | Assessment | Test control, alignment, and consistency |
Prioritize quality over quantity during this final phase. Ten technically strong attempts are more useful for skill development than thirty increasingly uncontrolled attempts.
Controlled exits are equally important. A handstand is not fully controlled if you cannot safely return your feet to the ground.
What Should You Measure on Day 30?
Your Day 30 assessment should measure several indicators rather than only whether you achieved a freestanding handstand.
Track:
- Best freestanding hold
- Number of controlled kick-ups
- Wall-hold duration
- Ability to maintain straight arms
- Body-line quality
- Confidence entering the position
- Ability to exit safely
- Wrist and shoulder comfort
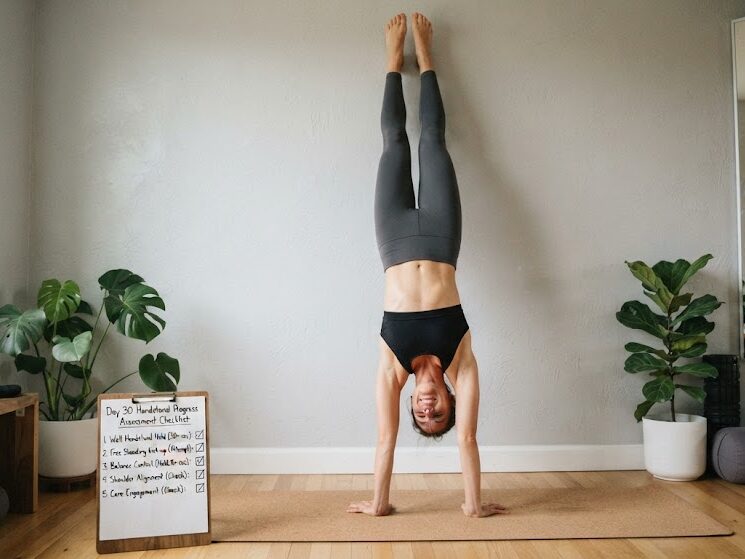
A 30-day handstand program can improve strength, body awareness, balance, and confidence, but a consistent freestanding handstand may take longer than 30 days for some beginners.
What Equipment Do You Need for a 30 Day Handstand Challenge?
One advantage of a 30 Day Handstand Challenge is that you need very little equipment. A wall and stable floor provide most of the support required for foundational practice.
Optional equipment can improve comfort, positioning, or exercise variety.
| Equipment | Essential? | Main Use |
|---|---|---|
| Clear wall | Yes | Supported handstands |
| Exercise mat | Recommended | Comfortable practice surface |
| Timer | Optional | Hold tracking |
| Yoga blocks | Optional | Mobility and positioning |
| Parallettes | Optional | Alternative hand position |
| Resistance band | Optional | Strength and mobility drills |
A wall is particularly useful for beginners because it provides external support while you learn alignment.
Parallettes can provide an alternative hand position for people who find extended-wrist positions uncomfortable, although they are not necessary for learning the skill.
You can also combine handstand practice with a Full Body Workout for Beginners while appropriately spacing challenging upper-body sessions.
What Is a Practical Handstand Training Setup?
A practical handstand setup requires a clear wall, stable surface, adequate lighting, and enough open space to safely exit the position.
The simpler the environment, the easier it is to concentrate on technique instead of worrying about obstacles.
A basic setup can support the entire 30-day program. You do not need an expensive home gym to practice foundational handstand skills.
Custom diagram suggestion: Create a labeled handstand alignment illustration showing hands, wrists, shoulders, ribs, core, hips, knees, and feet in a straight stacked position.
What Should You Do After Completing a 30 Day Handstand Challenge?
Completing a 30 Day Handstand Challenge does not mean your handstand training has to stop.
Instead, choose a progression that matches your current ability. Your next goal might involve longer holds, more consistent kick-ups, handstand shapes, shoulder taps, or advanced pressing skills.
How Can You Continue Your Handstand Progression?
Your next progression should depend on the skill you developed during the challenge.
Consider:
- Longer freestanding holds — Build consistency and endurance.
- Handstand shoulder taps — Develop controlled weight shifting.
- Handstand shapes — Practice tuck, straddle, and split variations.
- Handstand push-up preparation — Build pressing strength.
- Press-handstand preparation — Develop compression and shoulder strength.
- Freestanding kick-up consistency — Improve repeatability.
Maintaining mobility can also support continued practice, so you can use Mobility Workout alongside your handstand sessions.
What Is the Best Way to Keep Improving After Day 30?
The best way to continue improving is to choose one measurable handstand skill and practice it consistently while maintaining appropriate strength, mobility, and recovery.
Identify what currently limits your performance.
For example, if you can kick up successfully but cannot maintain balance, spend more time on finger pressure and short freestanding attempts. If your shoulders fatigue quickly, incorporate appropriate shoulder-strength exercises into your training.
Additionally, use our fitness recovery guidance to support recovery between challenging sessions.
Effective handstand practice emphasizes consistent, controlled attempts and progressive overload while allowing adequate recovery between challenging sessions.
Conclusion
The 30 Day Handstand Challenge provides a structured path from basic preparation to wall-supported training, balance drills, controlled kick-ups, and freestanding practice.
The most important result is not whether you achieve a perfect handstand on Day 30. Instead, look at whether you have developed better technique, body awareness, control, confidence, alignment, and consistency.
Handstand training is a long-term skill that rewards patience and repeated quality practice. Your next milestone could be a longer hold, a cleaner kick-up, improved alignment, better finger control, or a more controlled exit.
Continue building your foundation with calisthenics exercises for beginners, maintain wrist and shoulder mobility, and track measurable improvements rather than comparing your timeline with someone else’s.
Day 30 is not the finish line. It is the point where your handstand practice becomes more intentional.
FAQs
Can a beginner do a 30 Day Handstand Challenge?
Yes, beginners can follow a progressive plan using wall holds, strength exercises, and balance drills.
Can I learn a handstand in 1 month?
Yes, some beginners can learn a handstand in one month with consistent practice and proper progression.
Can you learn a handstand in 30 days?
Yes, you can improve your strength, balance, and technique in 30 days, although a freestanding handstand may take longer.
Is it possible to get in shape in 30 days?
Yes, consistent exercise can improve strength, fitness, mobility, and endurance in 30 days.
Is it okay to do handstands every day?
Yes, light practice can be done regularly, but your wrists and shoulders need adequate recovery.
How often should beginners practice handstands?
Beginners can practice regularly with short sessions while allowing enough recovery between demanding sessions.
How long should I practice handstands each day?
A 15–25 minute session can be enough for beginners when it includes warm-up, practice, and recovery.
What exercises help you learn a handstand?
Pike holds, wall walks, hollow holds, pike push-ups, and chest-to-wall handstands can build handstand strength.
Are wall handstands good for beginners?
Yes, wall handstands help beginners develop strength, alignment, confidence, and control.
How do you improve handstand balance?
You can improve balance through controlled kick-ups, finger pressure, weight shifts, and short freestanding attempts.
How long should you hold a beginner handstand?
Beginners can start with 15–30 second wall-supported holds while maintaining proper technique.
What is the longest time to do a handstand?
There is no typical maximum for beginners, so focus on gradually improving your hold time and control.
What are the most common handstand mistakes?
Common mistakes include over-kicking, bent elbows, passive shoulders, poor core control, and excessive practice.
Do you need equipment for a 30 Day Handstand Challenge?
No, a clear wall and stable floor are usually enough, while a mat and timer are optional.
What should I do after a 30 Day Handstand Challenge?
You can progress to longer holds, better kick-ups, balance drills, shoulder taps, and handstand push-up training.